How To Mix And Make Your Own Henna (DIY):
When creating your own henna you want to make sure you are working with BAQ (Body Art Quality) henna. Make sure it is very well sifted so there is no debris or twigs from the henna plant. (Zenia Henna is triple sifted and BAQ) Using fresh and high quality ingredients is also very important to get the best possible results. When buying henna products on store shelves or at markets keep in mind that these may be old or not stored properly (henna needs to be kept cool) and may have poor results. However even if they may stain a decent color they may be difficult to work with.
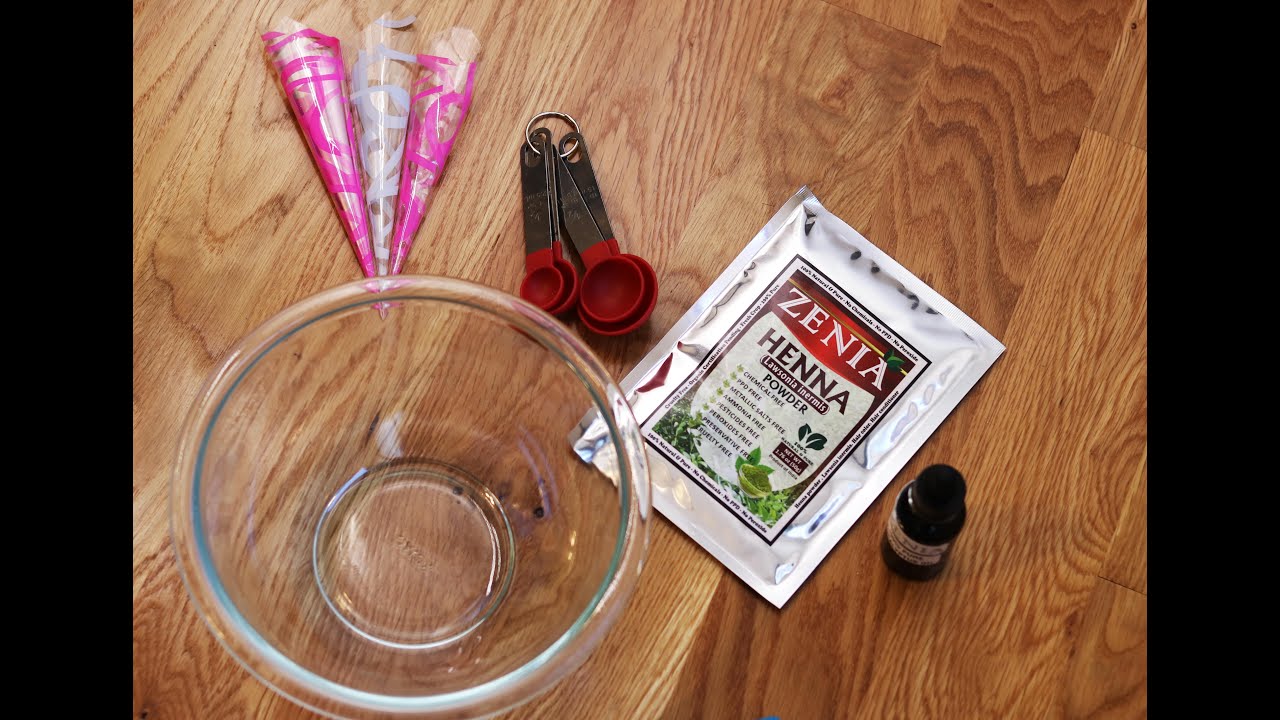
What You Will Need:
- Bowl and Spatula/Spoon
- Water
- Cling Wrap or Lid For The Bowl
- Pastry Bag or Ziplock Bag
- Body Art Quality Henna Powder
- Eucalyptus Essential Oil
- Sugar
- Cone/Applicator Bottle
Instructions:
This recipe makes about 3.5 ounces of henna paste which is about 7 squeeze bottles or 4-5 cones.
STEP 1 - In a bowl add 25 grams henna powder (1/4 cup) and 1 tbsp sugar. Mix the two dry ingredients together. Next, add 2 tsp eucalyptus essential oil and approximately 1/4 cup water. Then mix all the ingredients together till it is the consistency of mashed potatoes. Don't worry about small lumps, those will be gone later.
STEP 2 - Cover the mixture with cling wrap and let it sit for about 8 hours. If you want to speed up the process you can keep it somewhere warm (not hot) and it will be ready in about 4 hours. Most people just let it sit overnight. The reason why we let it sit for so long is for the dye release process. This is when the essential oil works their magic and activate the henna for the darkest possible color.
STEP 3 - This is when we get the henna to the perfect consistency and ready to apply! Add a small amount of water to the mixture and mix it really well. Continue adding water, in small amounts and mix well after each addition. More mixing = smoother paste! Once you’ve made your own henna paste a few times you'll get a feel for how thick/thin you prefer it.
STEP 4- For the final step just scoop your henna paste into a pastry bag or a ziplock bag and squeeze it down to the corner, tightly so there are no air bubbles. Then, cut the tip of the bag and fill your cones/applicator bottles. If you are using cones, seal the top with some tape. Now, you are ready to go! Here is a video to show the henna making process!
For best results, store any extra henna paste in a ziplock freezer bag and freeze. This will keep the henna fresh and ready to use for your next application!


Comments (8)
aVmsvHLNe
jYpGCxJoS
vbJqAVjzDucmgaYh
jlNeyBRIDFaOVMP
fhDeMyxjtoIXSbiU
oNTQxvSU
VWJaOpXDZ
JcHdLpuVNtTf